A Quick and Easy Presentation on Measuring Freeness in Pulp & Paper Production

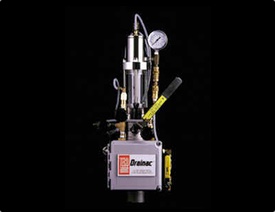
Drainac Freeness Analyzer
Production Superintendents, Machine Superintendents, Process Engineers, Machine Operators .... if you have basic paper machine production responsibility, you should look at this slideshow.

A Freeness Analyzer is an on-line, in-process field instrument used as a production orientated tool that directly measures drainage rate (freeness).

It operates on the basic principle of how easily water will drain through a pad of fiber. Approximately every 30 seconds, the Freeness Analyzer measures the rate of filtrate flow through a fiber pad.

Once the freeness has been determined, air pressure is increased to return the filtrate and fiber to the stock line in preparation for the next cycle. At the same time, flush water is introduced into the chamber to clean the screen and interior of the chamber.

This information is regarded as a “window” into the process as an indirect measurement of fiber quality. The TECO Drainac is the only freeness measurement device that actually measures the true drainage rate, or from the papermaker’s standpoint, actually measures the drainage of the stock on the forming fabric.


Industry Specific Flow Meter Brochures

Industries served by TECO
Industry Specific Flow Measurement Brochures
Here is a listing of flowmeter brochures for specific industries, courtesy of Badger Meter. The brochures provide proven and accepted products for the following markets and applications:

Water & Wastewater Brochure
Water and wastewater treatment facilities have complex operational processes, which involve a wide range of flow measurement tasks. These applications demand the highest flow meter accuracy and reliability, as well as long-term stability and a low cost-of-ownership.

Oil & Gas Brochure
In the oil and gas industry, the flow of liquids and gases must be measured during every phase of exploration, production and transportation. Upstream operations span offshore and onshore activities, including well testing, enhanced oil recovery, fractionation, completion, and separation to recover and prepare crude oil and natural gas.

Chemical & Petrochemical Brochure
Badger Meter products are used across the entire hydrocarbon sector — from upstream production to feedstock for the intermediate stage and downstream processing — in applications ranging from catalyst injection and gas flow measurement, to batching and blending, custody transfer and fugitive emissions monitoring.

HVAC & Building Automation Brochure
You and your customers expect peak performance every day year-round from your HVAC, hydronic chilled/hot water applications and irrigation systems. Products provide accurate measurements, energy calculations and integrated data communications to increase your building’s system performance.

Test & Measurement Brochure
A variety of highly accurate and dependable flow measurement solutions for the demanding test and measurement market.

Consider Flowmeter & Instrument Remanufacturing as a Viable Alternative to New

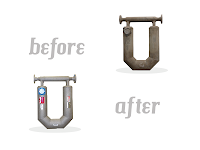
instrument remanufacture
Example of instrument
remanufacture
Many companies don't realize that when you have a failed magnetic flowmeter or mass flowmeter, it's often more cost-effective and efficient to have them restored to mint condition than it is to replace them with new units.

But if you send meters to the original manufacturer, they can disappear into their system for weeks or months. And you have no idea how long it will really take, or if it will fail again later from undetected problems.

magmeter remanufacture
Example of mag meter
remanufacture
The fact is you can't afford the loss of productivity or downtime. But what if there were a place you could send broken flowmeters that could save you money and time by restoring them to pristine condition. A cost-effective specialist who could guarantee rapid turnaround time and premium customer service. A team of experienced professionals with the capabilities to keep equipment in service, even if it's no longer supported by others.

For a proven partner like this, there's only TECO. Established in 1947, TECO has become the global leader in restoration and customization of magnetic flow meters, Coriolis meters, and other process control instruments. At TECO, they understand that time is money, which is why they provide the fastest turnaround time in the industry. TECO doesn't simply repair a broken part in return it, they do a full restoration and back the whole meter with a full warranty.
massmeter remanufacture
Example of mass flowmeter
remanufacture

TECO quality control includes NIST traceable flow calibration, which is often required by regulatory agencies and ISO 9000 standards.  TECO also provides independent calibration to serve your preventative maintenance and metrology needs. While their low-cost, high-quality work has made TECO the industry leader, it's their commitment to premium customer service that keeps their clients loyal. Extensive capabilities combined with a focus on service also means TECO can manufacture custom flowmeter solutions to meet the demands of severe applications.

  • Low cost, rapid restoration of magnetic flowmeters, mass flowmeters and other instruments
  • Pristine, like-new equipment
  • Backed with the full warranty
  • Customized solutions and expert customer service you can trust
It's all part of the package with TECO.

If you have failed magnetic flowmeters, Coriolis meters or other instruments, call TECO. After receiving your equipment, we'll turn around a quote in 48 hours or less. No return authorization required. To develop a customized solution for your your toughest application, contact TECO.

Welcome to the TECO Process Control Blog

Welcome! We hope (over time) you find this blog useful and it becomes a trusted resource for you to gather information about process control, instrumentation, valves and valve automation, and methods for saving costs through maintenance and service.  We plan on weekly blog posts  highlighting innovative process control solutions, insight to how industrial controls work, and new products that solve tough engineering challenges.

So Why Buy TECO Consistency Transmitters Anyway?

Consistency Transmitters
I'm glad you asked.

One thing that really differentiates TECO Consistency Transmitters is that all of our systems are shipped with built-in flow-rate compensation.

Blade style consistency sensors, in particular, are sensitive to shifts in production flow-rate. This means that their output has a component which is strictly a function of flow-rate. If this isn’t taken into account, changes in flow-rate will look like changes in consistency. All of our systems have a flow-rate input so that this flow-rate component can be automatically subtracted out of the consistency signal.

We are the only manufacturer that offers flow-rate compensation.

Of course, it would be nice if a sensor wasn’t sensitive to changes in flow-rate in the first place. This is the key feature of our C3000 and C5000 probe style sensors. Their design is such that they are insensitive to shifts in production flow-rate below 3.0 fps. This means that as long as the flow-rate stays below 3.0 fps, shifts in flow-rate will not affect the probe output signal at all. That said, we do recommend active compensation for flow-rates above 3.0 fps when using C3/5000 series sensors.

We are the only manufacturer that offers a probe style sensor.

Next, our C5000 sensor is retractable, which means that the sensor can be removed from the process while the process is active. This feature is particularly useful for hostile measurement environments such as blow lines and bleach plant operations.

While our systems are as robust, if not more so, than other manufacturers, the nature of mechanical passive sensors make them consumables. The retractable feature of the C5000 allows a customer to restore a critical measurement in minutes, instead of waiting weeks or months for a scheduled shutdown. This is a real advantage for our customers.

We are the only manufacturer that offers a retractable probe style sensor.

All of our sensors are hot-swappable, which means that you don’t have to go through a recalibration when a sensor is replaced. Just utilize the built-in normalization procedure to zero the replacement sensor and you are good to go.

All of our consistency transmitters can be upgraded to behave as a consistency controller. The transmitter can also be upgraded to function as multi-input controller, so that other process parameters can be adjusted for in the consistency control loop.

We are the only manufacturer whose consistency transmitter can also act as a dilution controller.
We are 100% Made in the USA. Our chief competitors are all of foreign manufacture.

Finally, TECO is aggressively price competitive, if not actually the least expensive consistency measurement option available.

I'd say that those are pretty good reasons. Don't you agree?

Sigma, Sigma.. Wherefore Art Thou, Sigma? A Discussion of Freeness Calibration

It’s a given that your Drainac and your lab evaluations of freeness won’t agree. This is just the statistical nature of the beast, so to speak – and it’s true, I might add, for each and every instrument in your mill.

“Why”, you ask, and it’s a good question.

In the case of freeness, you have to remember that lab evaluations of freeness are completed using some version of the TAPPI 227 method. I say “some version” because it’s a reality of daily mill life that almost no-one actually executes the TAPPI method according to the instructions in the method. Most labs will use some kind of shortcut. I can’t blame them, really… the TAPPI 227 method has a lot of steps in it and it takes forever to finish a test if you do it the way they say you should.

So, most labs will use a version of the TAPPI method and the Drainac uses something else. We don’t utilize the TAPPI 227 method in our instrument because, well, the TAPPI 227 method really isn’t that good of a test (this is true, incidentally, for other manual methods of assessing stock freeness, like the Schopper-Riegler approach). If you’ve ever heard of the skepticism that most paper makers have for the reliability of manual freeness tests, you know why.

There are a lot of advantages if you don’t use the TAPPI method. It’s because we do things differently that we can analyze samples so quickly (30 seconds!) and why we don’t have any moving parts in our system (which makes us the easiest system to maintain) and why we are the simplest system available in the world, but I digress.

Because we don’t do TAPPI 227, the Drainac doesn’t produce a CSF number. Instead, we produce a number that reflects how fast your stock will drain. This “Drainage" number is proportional to CSF freeness and, because it is proportional, you can build a mathematical relationship between the two independent assessments of freeness. This is the “Calibration” that everyone is always talking about.

If you take your time to do a calibration properly, not only do you arrive at an estimate of the

Because the lab and the Drainac use two different methods to assess stock freeness, you can bet that there will always be some difference between the two. The statistics associated with a calibration tells you just how much deviation you can expect to see on a day to day basis and when you should get excited about that difference.

More importantly, the statistics tell you when you shouldn’t get excited at all.

What do I mean by that? Well, every calibration regression produces an estimate of the average error inherent in that calibration, based on the data that was used. This is the “Sigma” (σ) that you may have heard of, and it is a very handy number to have in hand.

Assuming you’ve built your calibration properly, the statistics say that about 95% of the time, the deviation between the Drainac and your lab should fall within plus or minus two sigma (2σ) of each other. That means that 19 out of 20 times, you shouldn’t get excited if you see a difference of up to 2σ. It also says that 5% of the time, or once out every twenty samples, you can expect the deviation to exceed 2σ, and you should still not get excited.

mathematical relationship between your lab results and the Drainac output, you also get statistics which tell you how much faith you can put into that relationship. This last point is probably the most important aspect of any calibration, but it is also, unfortunately, what most people forget to take into account when comparing their lab numbers to the instrument.
People who get excited want to change things and the statistics tell when you’re justified to start thinking about making changes and when you really should leave things well enough alone.

This is the way it usually goes: The lab runs a sample and somebody notices that the Drainac and the lab are saying different things. “Oh, boy!” says the Somebody, “We can’t have that!” and immediately calls up the overworked E&I team. “The Drainac isn’t matching the lab results”, the Somebody says. “Get out there and make it read right, would you?”.

The overworked E&I team member dutifully trudges out to the Drainac and makes an adjustment to the system to make it match the current lab result and…

He really, really, really shouldn’t have done that.

Let me say that again.

It’s premature for the E&I tech to make any adjustments to the Drainac at this time. What the E&I tech should have done is to first check the deviation of the Drainac and Lab against the calibration 2σ.

As I mentioned earlier, assuming the calibration was done properly, 19 times out of 20, the deviation will be under 2σ. If the deviation is, in fact, under 2σ, then the E&I tech is finished. Everything is working as it should and nothing should be changed at all. Even if the deviation happens to exceed 2σ, the calibration statistics tell you that should expect to see that about once out of twenty times.

Really Important Rule #1

Most of the time, you should wait to make a change only when you see that the deviations consistently exceed 2σ.

Really Important Rule #2

When deviations do exceed 2σ, don’t assume that the Drainac is the problem.

Remember when I said earlier that the TAPPI 227 isn’t a great test? Well, it isn’t. The repeatability of that test stinks, and that’s when you do it according to the published method. It stinks even worse when you take shortcuts and frankly, most people do.

Just how bad is it for your case? That depends on what your lab people do. I always recommend that you run a Total Error of Variance test (TEV) to determine just how much faith to put into their lab results. The TEV is a sort of a poor man’s Six Sigma evaluation. It gives you an idea of just how much variability you can expect from your lab on any given day.

So, let’s say that you’ve done all that. You have a calibration with a defined 2σ. You’ve run a TEV on your lab and you know what to expect from them. Now, you’ve got a series of numbers that tell you that something is going on and you’ve concluded that the Drainac is the problem. It’s time to make some adjustments to the calibration, right?

Nope.

It’s time to check the Drainac. Clean it. Inspect it. Look for problems. Check the various operating pressures. Do all of the things that you need to do to make sure that the Drainac is functioning properly.

Let’s say that you’ve done all of that, too, and that there is still an unacceptable deviation between the Drainac and the lab. Probably the best thing to do at this time is to rerun the calibration, but if you don’t have the time to do that at the moment, you can simply shift the output of the Drainac by adjusting the BIAS of the Compensation Variable.

The Compensation Variable (COMP VAR) is a general input that you can use to apply a correction to the Drainac for some external process parameter. Most people never use this feature of the Drainac, but the BIAS component of the compensation variable is a handy way to add or subtract a number from the freeness output of the Drainac.

To adjust the bias, enter configuration mode and scroll to the COMP VAR parameter. Once there, scroll through the various attributes to get to the BIAS screen. Enter your desired offset value, either positive or negative, in the same units that the system is configured to output.

Your Drainac system will now adjust its output. Keep in mind that this is a stopgap only, you should plan to rerun your calibration if your deviations persist above 2σ.

Also, please remember that TECO is a resource for you. We are always happy to regress your data for you and tell you what your 2σ is for your calibration. We can also send you a spreadsheet which you can use to run a TEV on your lab.
Expanding the Sweet Spot: Measuring Pulp & Paper Stock Consistency Properly


If you want to measure consistency properly, it’s important to remember that all consistency transmitters have their so-called “application window”.  The application window consists of all those process parameters that have to be within a certain range in order for a particular transmitter to work properly. Which ones are relevant to you depend on the technology behind the consistency transmitter in question.


As long as you’re within a particular range for each of these parameters, you have a good chance that the instrument is reporting stock consistency reasonably well. Of course, if you get outside of that range – and unfortunately, it’s not always obvious that you have exceeded the limits – then the transmitter output can start to deviate from reality, sometimes in a really big way.


So, it pays to pay attention to the application window for an instrument - the “Sweet Spot” - if you hope to get the most out of your measurements. 


When it comes to mechanical transmitters, the process conditions you need to consider include production flow rate, furnish types and, oddly enough, stock consistency itself. 


We’ll start this discussion by asking the question:  Why is production flow rate important? 


Simple passive mechanical transmitters like blades respond to the “apparent viscosity” of the process.  Apparent viscosity is just a fancy way of referring to how thick the process slurry is.  As you would expect, the higher the consistency, the “thicker” the process is. 


Blades, however, don’t really measure the thickness of the stock directly.  Instead, they respond to changes in force as stock moves past the blade (that’s why, incidentally, they are called shear force systems).  The stock imparts a force to the blade as it moves – or shears – across the blade surface.  Stock motion, however, is the key point – the stock has to be moving past the blade.  A blade transmitter immersed in stationary stock would register zero, irrespective of what the consistency is. 


What isn’t always obvious, however, is that the force that the blade is responding to isn’t merely a function of consistency.  It has a flow-rate component to it as well.  As the flow-rate goes up, the force imparted to the blade will also go up.  This is perhaps one of the most important aspects of blade systems and it is also, one of the things that is most often overlooked by mills.  Simply put,


Blade Force =  Consistency Force + Flow-Rate Force


So how do you deal with the flow rate component?  Some manufacturers will publish flow velocity-consistency graphs for their designs.  The implication here is that if your process stays within the valid region as defined by the manufacturer, the measured force will be consistent with changes in consistency.  This is a reasonable approach if flow-rate variability is kept to a minimum,  but it is not suitable for applications with highly variable flow regimes.  Under these circumstances, you must compensate for variable flow-rates if you hope to get a useful consistency measurement.


That said, there are two ways you can compensate for highly variable flow rates.


You can measure the flow rate and mathematically subtract out the flow rate component from the force signal and/or you can select a sensor geometry which has a flow rate response which minimizes the impact of flow rate for your application.


When it comes to TECO’s StockRite® line of consistency transmitters, you can get both.


TECO’s C6000 consistency transmitters are shipped with automatic flow-rate compensation built-in.  All you need to do is to land a flow-rate signal on the transmitter and the flow-rate component is automatically removed from the consistency signal in real time.  You can drop our C9700 blade into your existing blade application – our systems fit our competitors process connections, by the way – and automatically compensate for flow rates which vary from 0.5 to 12.0 fps.


That’s what I call expanding the sweet spot.


Of course, wouldn’t it be nice if you had a sensor design which was immune to variability in flow rate in the first place? I’m happy to say that there is one available:  Our C3000 Probe design has a flat flow-rate response for production flow rates up to 3.0 fps.  That means that the C3000 has a zero flow-rate component for all flow rates below 3.0 fps.  Put another way, you could have production rates of over 1000 GPM in a 12” line and never have to worry about flow rates disrupting your consistency signals ever again.


If you’re having trouble with your consistency measurements, give us a call.  We’ll really good at helping our customers get the most out of their consistency measurements.